Gye Greene's Thoughts

Gye Greene's Thoughts (w/ apologies to The Smithereens and their similarly-titled album!)

Tuesday, January 14, 2020

DIY video lighting from LED Christmas lights

This is a vague sort of instructional blog entry on making some DIY video lighting out of end-of-season discounted LED Christmas lights:  it's a proof of concept that turned out reasonably well.


I made three attempts:

-One with a single strand of blue lights

-One with two strands of "icicle" lights

-One with three strands of four-color "icicle" lights.


The "traditional" strand of lights was the easiest to work with:  however, I was stuck with whatever failed to sell during the Christmas season, and was therefore available on the clearance rack.


Here's the basic approach:

1) Get a sheet of plywood that corresponds in some way to the length and format of the Christmas lights:  for example, if the lights are in "icicle" layout, then the height of the plywood has to be enough to accommodate the "dangle" of the icicles (e.g. the white lights, photo to the left).  Note also that the size of the light source makes it "hard" or "soft":  a small light source gives crisp shadows, while a large light source makes it more diffuse (and softer shadows).

2) Get some sort of wood and make a simple frame on the back.  Nail and/or glue it to the plywood.  Note that whereever you plan to install a nail, you'll need to back it with the wood.  Note that I used really thin plywood (about the thickness of a clipboard -- but, free!), so I had to use "proper" wood as a frame.


3) Drill some holes for hanging the completed project.  I suggest having two loops of cord at the top, and two loops of cord at the bottom:  two at the top helps to distribute the weight (when hanging), and helps to control the direction; two at the bottom lets you angle the board, if desired.

4) Paint the front of the board silver or white, to help to capitalize on the "wasted" light that shines backwards towards the plywood.

5) Install nails wherever you want to wrap the Christmas lights -- being sure to put large washers under the heads, so that the lights don't fall off the end of the nails.  I also suggest using a block of wood (or a thick book; or whatever) as a "spacer" to measure the approximate depth of the nails, thus keeping them uniform.

6) Wind the lights in a way that makes sense:  to the left is the blue lights, where the plywood is small and thus only needed a few nails for stringing the lights.  A consideration for the four-colored lights (see below) was that I tried to space the nails such that the layers of colors aligned (e.g. red on top of red) -- which somewhat worked.  I then bundled them intro groups, per color, using gaffer's tape (like duct tape, but with less sticky residue).

Here's the green, and the blue, lights from the four-colored light set, with the red and the yellow lights hidden:


And, with them turned on (note the towel dampening the yellow and the red lights -- although you can still see them shining off the back; would need to have the towel hang all the way down):


If you use multiple strings of lights, you can vary the intensity of the unit by how many of the strings you plug in.

What I found is that the single strand of blue lights seems as bright as the two sets of white lights.

The multi-colored lights are "okay":  I grouped the colors, so that I could "dial in" different colors (e.g. red + yellow), by draping the "unwanted" colors and covering the top edge with a heavy towel.  But because there's four colors per strand, even with three strings of light, a single color is only 3/4 the intensity of the single blue-only light (1/4 of a strand per color, times three strands).


Finally, here's a shot of the green strands, and the two strands of white lights.

I think the white lights were the most successful in terms of trying to emulate "standard" video lighting:  it ended up being reasonably powerful, and (because of the surface area), reasonably "soft".

The blue lights were second-best:  due to the small board, they're concentrated -- but they're reasonably powerful, and (as per the examples below) could be a useful "effect" light.

The multi-colored lights could be usable -- but the light intensity is fairly mild, and thus are more of a subtle accent.  In order to be bright enough to be noticeable, you'd have to use them fairly close -- but keep them out of the frame.


Lighting examples: 
 
Blue light on one side; white light on the other:


Room light (i.e. ceiling light fixture), plus (I think) blue lights on one side (from below), and green lights on the other side:  


Blue lights on one side; I think red and yellow (from the four-color lights) on the other (dangit!  should've taken notes), and (I think!) a bounce light from the ceiling (a LED "shop light"):


White on one side, green on the other:


I've also included a YouTube video I posted, showing the end results.  The video quality isn't the greatest (esp. the first clip; ironically, I should've used some lighting).  But I prioritized "getting it done, and posted" rather than delaying to re-shoot -- and then never finishing.

Shot with my seven year old, $50 Android phone.  ;)


Ayep!


--GG

Labels: , ,

Tuesday, January 16, 2018

Snare drum tidying

This YouTube video started off by seeing whether a US$39 snare drum from  Amazon.com was worthwhile.  But it ended up being tips for tidying up and improving snare drums.

I learned a lot.


Although:  he ends up improving the sound by upgrading the top head, bottom head, and the snare wires -- which would substantially add to the "$39" initial cost (he says $55 total; that's way cheaper than what I could find heads for in Australia...).

He acknowledges this -- and points out that (much like guitar strings!), heads and snares are consumables, so you'd have to swap them out eventually anyhow.

Fair enough.

That said:  I couldn't determine a strong difference between the sound around 2:00, and the post-tidying sound around 8:45.  Maybe it's just my cheap PC speakers.

And at the very end, when he compares the "straight out of the box", "with tuning", and "tidied up" -- I actually prefer the "with tuning, but not yet 'tidied up'" sound.


--GG

Labels: , ,

Thursday, January 26, 2017

Applied beeswax

Part of building my "crate backback" (sorry -- no links; haven't yet posted it) involved poking holes in heavy fabric (for the shoulder straps). 

However, the optimally-sized punch had an uncomfortable handle:  it was a metal cone, with an open end:  imagine an ice-cream cone with a icepick protruding from the bottom.  It looks like a user-made tool.

I used it a little bit like that -- but my hand started getting sore from the exposed metal rim digging into the palm of my hand as I pushed.


Yeah, I could've just worn a glove:  but I thought, eh -- may as well build a solution.

So, I got out my "beeswax-melting toaster oven" (dedicated to this purpose).


After the jar of beeswax (I keep it handy; someday I'll have to top it up with addt'l beeswax) was sufficiently hot, I took the pliers (pictured above) and poured the melted beeswax into the hollow handle, thus filling the void.

Instead of holding the punch (hot drippage!), I poked it into a piece of wood.


And then, kind of like old-timey "dipped" candles, I'd dunk the end of the handle into the melted beeswax; let it cool; dunk; cool; and repeat.


And:  here's the result.

Rounded, comfortable, and reasonably sturdy: a room-temperature block of beeswax is surprisingly hard.

And, it smells nice:  like honey.


--GG

Labels: , ,

Sunday, January 22, 2017

Suitcase drum kit

Saw this on YouTube, and I thought I'd share.

Using some leftover drum parts (he buys used drum gear inexpensively, then mods them), this guy made a usable drum kit that fits inside an old hard-sided suitcase.


There's a link in the top left corner, at about 0:03, that shows a video where he demonstrates that it all indeed fits inside the suitcase.


Skip to about 6:05 to see him actually playing it:  all of the video up to that point is showing him building it.


It would be good for busking -- especially if you showed the audience how it all comes out of the suitcase.  You'd probably get more tips (because it would be more impressive) if you packed it away and re-assembled it every few songs.


And, inspired by that video, here's some more YouTube folks for suitcase drum kits.  I excluded videos where they simply use the suitcase as a drum, rather than having a functioning drum kit that fits inside the suitcase.

The one that I embedded, above, was possibly the most complicated of the ones that I found.


This one is a little bit of a cheat, as he mounts the ride cymbal on the outside:  it seems like you could just use a slightly smaller-diamter cymbal.  But, it's a remarkably complete kit.  Not as geeky, though, to have "regular" stands that are just folded up inside the case:  I prefer the above approach, where the suitcase is also the frame.


This one is a minimalist set-up.


This one is just a simplified kit where everything fits in the suitcase:  he intentionally didn't modify the suitcase at all.  But I included this one because he sits on the suitcase, instead of a drum throne, and he also uses the suitcase as the kick drum as he sits on it -- like a cajon.


I think this one's toms fit inside the suitcase -- although he doesn't actually show this aspect.  I like the drum rim:  a really good kick drum sound..  Another one of these drum videos (I forget which one) mentioned that if it's an old plywood suitcase the kick drum sound is already pretty good -- but if it's a softer, floppier plastic-sided suitcase then it would benefit from the extra effort to install a ring.


This one is pretty simple and straightforward. This one doesn't show the gear fitting into the suitcase:  but given that the guy has added dolly wheels to the underside of the suitcase -- plus the nature of the brackets on the high hat stand -- I'd expect that it would.


As you can see, there are several different approaches.  There's more -- but I just chose the ones that I thought were better ones.  Although there's a bunch that I didn't take the time to review.


Oh:  and this one (below) violates my rules:  it's "just" a drum used as a kick drum.  But I like the "double beater" approach -- especially with the metal "brush" and the license plate -- so I included it.


So:  another project for my "To Do" list.  I have some ideas.  ;)


--GG

Labels: ,

Sunday, January 15, 2017

Repaired a chair

It's the first weekend of a week's vacation -- and I like to spend my vacation "getting things done".   Here's one of my mini-projects.


People around here sometimes leave "givaway" items along the grassy strip near the road, in front of their house.  I picked this chair up a few weeks ago.

I sat on it before throwing it in the truck.  Yup:  comfortable.  Surprisingly so. 


Someone had used some sort of gummy construction adhesive to try to glue the loose slat.  It hadn't really worked, so the slat was held on with a long strip of packing tape.

And the person had also glued it in the wrong direction:  the curved front of the slat was towards the rear -- but the other three were towards the front.


So, first I used a chisel to get rid of most of the crummy adhesive.  Then I finished up with some sandpaper, for the residual crud.


Here's my glue-up.  I'm using little wooden wedges to fine-tune the side-to-side alignment of the slat -- and clamps to align the ends of the slat with its neighbors.

And, of course, clamps on either end of the slat, to hold it in place until the **decent** glue dries.


Hm!  I thought I'd taken a photo of the finished product -- but I guess not.

Well... you can imagine.


Anyhow:  I gained a free, sturdy, comfortable chair, for the cost of a little labor and a few squeezings of woodworking glue.


--GG

Labels: , ,

Tuesday, July 01, 2014

Actually using them

One of my arguments for why I'm not a hoarder -- at least, not to a pathological degree -- is that I actually use some of the things I save.  They're "spare parts".

If I collected bits and pieces, and then didn't remember what I had -- or remembered what I had, but couldn't find them when I needed them -- then it's no good having them.  But if I **do** remember where there are...  then, good thing I have 'em!


For example:  I'm on a few day's vacation, so I'm doing various useful things around the house.  As I took out our battered (but faithful!) old electric lawnmower, I decided that it was finally time to repair the back flap -- it was just **too** worn:  the rust hole was so large that chunks of grass were spraying out at me.  Plus, it's a safety concern:  hard things could be flung at me as well.

The photo above shows it post-repair -- but you can see how large the hole was.


I figured I should cover up the hole with some sort of sheet good.  Originally, I was going to use plywood -- so I went to my stash of small-to-medium-sized sheet goods.

Aha!  This old plastic cutting board!

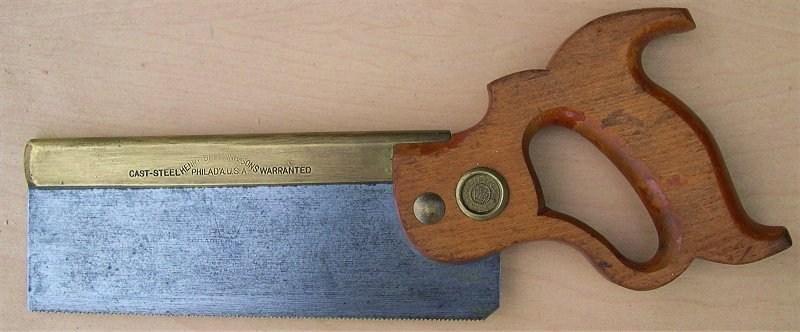
I held it up to the inside of the flap; marked a "cut line" (with a trysquare!); and trimmed off the excess -- the section that used to have the carry handle.  I just used a regular backsaw.


Then I drilled a few holes, and attached it to the inside of the flap. 

You'll notice that I have the long sections of the bolts protruding outwards, rather than inwards, towards the blades.  This was an intentional trade-off between aesthetics and functional design:  the relatively smooth bolt heads are facing inwards -- meaning that they'll collect fewer grass clippings than the bolt shafts would, had the bolts been pointing inwards.  And although having the bolts protruding towards my legs is a minor safety concern, it's pretty darned minor:  my legs don't get close enough for me to be in danger.


As a bonus, notice how I've "clocked" the screws:  all of the slots are aligned (the red lines are just for emphasis).

My dad taught me this -- although he didn't have a specific name for it.  I think his own dad taught him this, as well.  It shows pride in one's work, and attention to detail.

Or at least as much pride in one's work as could be expected from someone who re-uses old plastic cutting boards to repair their electric lawn mower.


--GG

Labels: , ,

Saturday, April 26, 2014

DIY Blastix or bundled rod drumsticks

Earlier I posted a blog entry on home-made drumming "brushes" -- which were actual dishwashing brushes.  I also made some mega-heavy, Taiko-style drumsticks.  This current blog entry is somewhere in the middle of that range of exploration:  some homemade "bundled rods" or Blastix.

Bundled rods are basically thin dowels, bundled together and used as drumsticks.  They're partway along the continuum between drumsticks and "brushes".

My thought was: instead of paying $15-$25 (horrors!) on a factory-made "bundled rod" drumstick, how hard would it be to make my own?  And, would it sound OK?


For raw materials, I bought a pair of bamboo sushi mats from Daiso, a retail chain where everything in the store is AU$2.80.  I also bought a pair of bamboo placemats from their competetors, Danda, where everything is also AU$2.80.  My basic outlay was therefore $5.60 per pair of drumsticks.

However, I also ended up paying $7.19 for a roll of decent-quality green duct tape (green tape is more interesting than silver or black).  Technically it was "cloth tape", with embedded threads for strength.  Since this project only used a few feet of the roll, I'm not sure how much of the total cost of the roll I should assign to the DIY Blastix:  maybe 30c?

And I also used a bit of glue.  More on that later.

As you can see from the photo, the two types of mats happen to be the same length.  This is useful for comparing the sound of the two materials, as the length of the material is held constant between them.


As you can see, my hand width indicates that the finished product should be missing the top two rows of string, but the lower rows might as well be retained in the final product:  it makes the rolling easier, and provides a bit of substance under my grip.

In addition, my approach is to remove only the second-from-the-tip row of string:  retaining the row on the end helps to keep the bundle together, and because it's at the tip, it should be pretty easy to remove after everything is assembled.  In contrast, the "second row" would be a nuisance to try to remove, post-assembly.


The weight and cross-section of the sushi mat is different than the black-stained placemat.  I think both are bamboo.  However, the placemat strips are round in cross-section, and thinner than the sushi mat.  Here you can (hopefully!) see that the sushi mat has a series of half-circles (or maybe 1/3 circles?).

I decided to roll the mat with the curved portions outwards:  it would make a smoother exterior, which would be less likely to dig into my hands.


Here's a shot of the sushi-rolling mats, with the second-from-the-
top strings removed.

Note the heavy-duty waxed paper, to keep the excess glue off my workbench.

Handy hint:  the waxed paper is actually the bag from inside a dried cereal box.  It's heavier-duty than "regular" waxed paper.  Because the inside of the bag tends to have cereal dust, I write "outside" on the outside of the bag, and make sure that the clean "outside" of the bag is what touches my workpiece.


This photo shows the gluing pattern that I used:  a strip down each side, along the thicker "ends" of the placement, and then one stripe of glue along each interwoven string.

I'm just using regular white woodworking glue (PVA, I believe).  However, it's the "Exterior grade, water-resistant" type of glue:  I figured there was no point in building something that a hot summer's day would destroy.


After laying down the glue, I held the mats tightly to the work- surface, and rolled them as tightly as I could -- being sure to keep the ends nicely aligned.

Note that I intentionally rolled one mat clockwise, and the other counter-clockwise.  This resulted in a "matched" set of sticks that were mirror-image of each other.

Then I took the green "cloth tape" and wrapped each stick twice:  two layers along the "upper" string's glue-line, and two more layers on the "lower" string's glue-line.  "Upper" and "lower" refer to my hand placement on the stick.


After gluing, I further aligned the sticks by forcefully tamping down the butt ends against the workbench.
You can see the size of my fist, relative to the project:  the upper band of green tape is peeking out between my fingers.


There was still a little alignment work to be done, so I also tried to tamp it down a little bit with a mallet.  It helped a little.
(The mallet was created by my late paternal grandfather, BTW:  it's my "go to" mallet, and ends up getting used on just about every project that involves striking against wood.)


Finally, I set up my creations to glue up overnight.  I placed them in an old cake pan, in case the glue dribbled.  I also placed them with the tips pointing up, so that the excess glue would drain away from the tips:  I wanted to ensure that the "bristles" could move freely, rather than accidentally get bound by glue.

Here are the (near-)final products:

For the purposes of illustration, I took the picture partway through unravelling the end string.


Finally, here's what they sound like:


One of these days I'll purchase a set of actual Blastix or "bundled rods", and compare them to my home-made devices.  Eventually.  :)


--GG

Labels: , ,